Wednesday, February 29, 2012

Document Size increases on changing from Higher PPI to Lower PPI || What exactly is PPI - Pixels Per Inch in a Photograph

First of all, Let's understand what PPI is ? PPI stands for 'Pixels per Inch', which has literal meaning that when a image is constructed, how many pixels are places in one inch region of that photograph. More the pixels, better is quality and increase the chances of using this image for various purposes. This is one of the reason that many times people reduce the PPI for a photograph before posting on websites or blogs, so that others can't use them for any commercial purpose. Let's continue this discussion from here...

Saturday, February 25, 2012

Incorrect Sunbofders created while importing through Adobe Photo Downloader in Adobe Photoshop Elements 10.0 || Hot-Fixes for Adobe Photo Downloader in PSE10

Recently Adobe found some problem with Adobe Photo Downloader in Adobe Photoshop Elements 10.0 and some fixes have been provided. This mainly talks about the workflow when users download media-files (photos or videos) using Adobe Photo Downloader, subfolders are created with an incorrect date. Select Advanced Dialog > Create Subfolder > Shot Date  from Adobe Photo Downloader to create a subfolder for the downloaded assets. The subfolder name has an incorrect date. This is the user problem Adobe has tried to fix.

If you are facing this issue and want to resolve check out following links as per your version of Adobe Photoshop Elements 10.0.

http://kb2.adobe.com/cps/930/cpsid_93025.html - For Users having Windows version of Adobe Photoshop Elements

http://kb2.adobe.com/cps/930/cpsid_93050.html - For Users having Mac version of Adobe Photoshop Elements

Friday, February 24, 2012

Skin Color Correction in Adobe Photoshop Elements || Red, Cyan & Yellow color corrections for natural skin color.

Skin Color Correction is one of the main topic which is discussed many times in various Photo Editing workshops, Conferences and popularly in Fashion workshops. Today we are going to discuss some very basic workflows which can help you getting decent skin colors are adjustments. This article is mainly around some basic tools which can be used to correct colors in general, but example is mainly for skin color. Let's check out these basics and see how these work for you...

Skin Color Correction is one of the main topic which is discussed many times in various Photo Editing workshops, Conferences and popularly in Fashion workshops. Today we are going to discuss some very basic workflows which can help you getting decent skin colors are adjustments. This article is mainly around some basic tools which can be used to correct colors in general, but example is mainly for skin color. Let's check out these basics and see how these work for you.. Before we start with Color Correction in Adobe Photoshop Elements, let us make this clear that skin color varies from one region of the world to other and so values of basic colors. But method we will discuss should be helpful in handling all natural shades of human skin.1. As a logical step, we would want to open the photograph in Adobe Camera Raw Dialog, so just go to File Menu and select Open as option as shown in the image below 2. Following dialog will be opened. Select the Photograph and open as a Camera Raw file which can be defined in the second dropdown3. The very basic idea to open in Adobe Camera Raw dialog is to do some basic adjustments like Auto White-Balancing etc4. Notice the huge difference by just selecting Auto option in White-Balance Control of Adobe Camera Raw Dialog in Photoshop Elements5. When done with basic adjustments in Adobe Camera Raw dialog, click on Open File button which will open the photograph in Adobe Photoshop Elements Editor workspace. Now go to Adjustment Layer options and select Hue/Saturation Adjustment Layer in Adobe Photoshop Elements as shown in image below.6. At first we select Yellow channel and played with Saturation slider mainly. This photograph was too vibrant, probably due to wrong White balance and odd light conditions while photo was shot. Saturation is too high, so we reduced it for yellow. Image below shows the photograph before change7. Here are results after reducing Saturation for Yellow channel and then moved to Cyan and also played with Red8. Hope you got the idea of playing with different colors channels and their saturation level. This gives lot of flexibility in controlling Saturation, luminance and Hues of various color channels like Red, Green, Blue, Yellow, Cyan and Meganta8. As an added thing we can continue to play around with other Adjustement layers for Birghtness, Contrast etc...

Friday, February 17, 2012

Top Five Basic Tips to make your Photograph Extra-Ordinary from a very casual & ordinary shot

Today one of my friend came to me and asked about some basic tips to improve his casual shots from last trip to Europe. During the process, I told him very basic things which helped him making Photographs better. I thought of sharing the top five edits one should try to make an ordinary photograph extra-ordinary. Let's check out..Let's take a casual shot and go step by step to understand the sequence of Edits I would recommend 1. Open a Photograph in Adobe Photoshop Elements through File Menu.2. Select Crop tool on Left Tool-bar and remove unwanted areas. Also try to fit your main subject as per rule of thirds, if possible. If you don't know about it, forget and we shall share more details about it.3. Now do to Adjustment Layer options below Layer Panel and select Levels. Levels Adjustment Layer makes a lot of difference to a Photograph. See the screenshot below to understand what you need to select and click.4. Notice the highlighted part below, which should also be visible on your workspace of Adobe Photoshop Elements5. Moved extreme sliders towards inside until you feel that it's making photograph too dark or too light.  When done, select the middle pointer and play with it. Extreme pointers are for handling Darker Pixels and Brighter pixels of a Photograph. Middle slider works on Mid-Tones. Levels help in making elements of the photograph stronger. At times, it can be a big blunder is not used appropriately6. Notice the changes we did to this Photograph and amount of movement in each slider. You may choose to stick to a limit which will also give you decent results unless photograph is not clicked in extreme light conditions - Dark area or very bright area.7. Now check out the image below to know about next adjustment we are going to discuss. Next is to select Brightness/Contrast Adjustment Layer.8. Play with Brightness and Contrast sliders. Both of these sliders need to b used in sync as right mix of Brightness and Contrast is important. For example, if you have photographs with darker shades, you may want to increase the Brightness by keeping contrast low or Vice-vers 9. Hope so far you have been liking the change in above photograph and the photograph you are trying in your Photoshop Elements. If you are not trying it., believe me it's not going to help anyway. So if not started yet, open your workspace and follow from top. If not completely, you will enjoy the process and the sequence shared here. With practice you can do miracles with these editing steps. It's all about understanding the compositions with respect to lighting, contrast, colors and placement10. At times, Editing tend to change the colors in a photograph. In above photograph I notice pale colored tint and want to remove that. At least want to keep the hen in white. So let's select Hue/Saturation Adjustment Layer.11. In above photograph Saturation of Yellow is decreased so that it looks white and more real. At the same time Hue of red is changed in conjunction with increasing the Saturation 12. We have applied four adjustments to original Photograph so far - Crop, Levels, Brightness/Contrast, Hue/Saturation. Now we want to just add a frame to the photograph. Few people don't like Frames so can simply avoid the last step and we promise to share more tips around making photograph beautiful with minimal efforts.13. If want to add frame, go to Image Menu and Resize Canvas Size.14. Below shown dialog will be shown. Choose the border size accordingly with color of your choice and click OK.You are done with this and hope you understood the basic concepts around these 5 editing controls which is more important than your final result. It's completely OK, if you haven't got right result in one go. Now you can simply save the results as PSD and later adjustment layers can be tweaked to make them better.

Today one of my friend came to me and asked about some basic tips to improve his casual shots from last trip to Europe. During the process, I told him very basic things which helped him making Photographs better. I thought of sharing the top five edits one should try to make an ordinary photograph extra-ordinary. Let's check out...

Sunday, February 12, 2012

Why I am seeing limited number of options in Save As dialog of Adobe Photoshop Elements || Lesser saving options in Adobe Photoshop Elements

Are you trying to save your photograph as a JEPG and not finding this option in Save dialog OR facing the same problem for other file-format, here is a short answer for your problem.

Thursday, February 9, 2012

Don't have DVD Drive in my Computer || How to install Adobe Photoshop Elements on a computer having no DVD-Drive

Does it sound weird to you? If not, you are definitely dealing with latest technologies or smart enough to understand the other way of doing so :). Today when I read one of such problem, I was feeling sad about the person who had received a PSE box as a gift and doesn't have DVD drive on his machine. For some time I was blank and feeling uncomfortable in replying to that person on Adobe Forums. But of course, there is a solution to every problem and companies like Adobe provide enough solutions to deal with such situations. Let's discuss more around this interesting incident with more light on latest technologies, where Hardware limitations can be overcome.

Wednesday, February 8, 2012

How to see File-Names in Adobe Photoshop Elements Organizer || Seeing Photograph Names in Organizer Image-Well

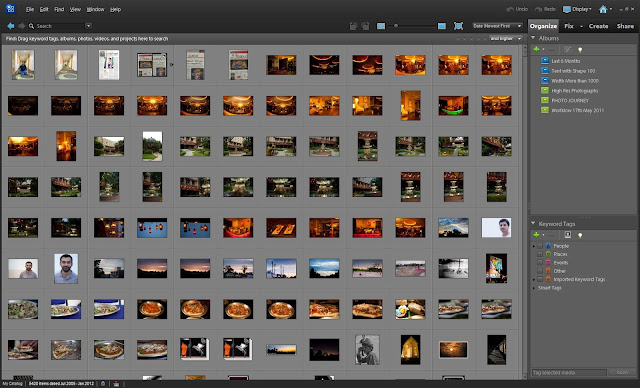
Recently we saw an interesting discussion on Adobe Forums, where one of the user of Adobe Photoshop Elements is confused about the fact that filenames are shown in Orgaizer at times and disappear soon. After more discussion around the same, it came out as a desired behavior which is governed through some settings and controls in Elements Organizer. Let's go through following steps to understand it in better wayIn your Organizer, if you are seeing only Thumbnails and no information like Date or Filename then probably Details option is off in View Menu. Please go to View Menu and check that Details is checked.There are high chances that you will start seeing date under Image thumbnails and if not then you have too small thumbnails inside Organizer Imagewell. If you are seeing Dates now, then move to next step, other go to the bottom and understand the function of Thumbnail Size Slider in Organizer which plays a major roleNow ensure that 'Show File Names' option is checked. if it's not then you will only see Date information and not file-namesAfter checking both the options for Details and Show File names, you should be able to see appropriate information below each thumbnail in elements Organizer. Even now, you are failing to see any information, please go to Thumbnail Slider on the top and increase Thumbnail Sizes in your Elements Organizer.Please feel free to put comments here with your specific queries around this topic or anything else in Adobe Photoshop Elements.

Recently we saw an interesting discussion on Adobe Forums, where one of the user of Adobe Photoshop Elements is confused about the fact that filenames are shown in Orgaizer at times and disappear soon. After more discussion around the same, it came out as a desired behavior which is governed through some settings and controls in Elements Organizer. Let's go through following steps to understand it in better way.

Friday, February 3, 2012

How to get rid of People Recognition Rectangles in Adobe Photoshop Elements Organizer || Hiding Face Recognition Rectangles

Recently we discovered that some of the folks don't want to see people recognition controls all the time. And the first obvious thing is to stop Automatic People Recognition in Adobe Photoshop Elements Organizer. This can be easily achieved through Preferences dialog of Organizer. There is an option to uncheck 'Analyze Photos for People Automatically' option in Media-Analysis Preferences, which can be seen in the image shown below. By unchecking this option, we actually say not to work on detecting faces in photographs but after this rectangles for already recognized faces will be shown in Organizer. If you want to get rid of these rectangles as well, just go to Edit Menu and uncheck 'Show People Recognition'. First image shows how to do it.Please feel free to comment back with appropriate feedback about this article or others on this blog.

Search This Blog